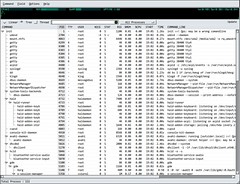
gt5 is a console command which provides an easy to understand interface to show a detailed disk usage list. Due to its console nature, i recommend using this tool for remote computers too.
Install it on Ubuntu using the following command: sudo apt-get install gt5
iftop does for network usage what top does for CPU usage. It listens to network traffic on a named interface and displays a table of current bandwidth usage by pairs of hosts.
More info here.
It is possible to install Firefox add-ons for all users that use a computer instead of installing them for every user separately. This is helpful if you are the computer guy in the family for instance and want everyone to have a basic set of extensions enabled that add functionality and security to the accounts.
The process of installing Firefox add-ons globally looks like the following. Download the xpi file instead of clicking on it which would install it directly. Once the add-on has been downloaded you use the following command at the run prompt (type Windows R): firefox -install-global-extension
Let me give you an example: firefox -install-global-extension c:\extension.xpi
The add-on will be silently installed and is available normally afterwards in the Tools > Add-ons menu of Firefox. Only administrators may uninstall the add-on but it is working for all users who are running Firefox.
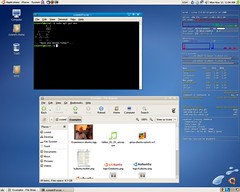
Qps is a visual process manager, an X11 version of “top” or “ps” that displays processes in a window and lets you sort and manipulate them.
Install it on Ubuntu using the following command: sudo apt-get install qps
Screenshot:
phpIP Management is a complete IPv4 IPAM (IP address management) suite, built to handle the complexity of managing today’s IP address space. phpIP Management was built to scale and address the full lifecycle of IP address space using techniques that are not administratively intensive. http://www.phpip.net/index.php
If you have downloaded some video and it’s packed in multi-volume archive, you can play the file without unpacking.
This is how you do it in Ubuntu. It should work fine on any linux distribution.
You wil need “unrar” and “vlc” or any other video player.
So, in Ubuntu, open a terminal and install these packages. Skip this step if you have allready installed the “unrar” and “vlc” packeges. sudo apt-get install unrar vlc
Then issue the fallowing command: unrar p -inul /example/path/to/Some.Scene.Release/some.sr.r00 | vlc -
What the command does:
unrar = starts unrar
p = outputs the extraction data of the file
-inul = disables error messages
/example/path/to/Some.Scene.Release/some.sr.r00 = path to one of the scene release’s rar files
| vlc – = pipes the output of the extraction into vlc that starts to play the output, and therefore plays the video file that is within the rar files. Don’t forget the ending “-“, or it won’t work. You can use another video player if you want, just replace “vlc” with what you want. I have only tested this with vlc and mplayer.
One bad thing with this trick is that you can only pause and play the file, but not rewind or fast forward.
In Synaptic Package Manger, there is a built-in feature that gets rid of old
Residual Config packages. Residual Config packages are usually dependency
packages that are left behind after you uninstall a package from your machine.
To use this feature, go to System > Administration > Synaptic Package Manager.
On the bottom left hand corner of the window, click the Status button. In the
list above the Sections, Status, Search, and Custom buttons, you should see the
following text:
Quote:
Shell
1
2
3
4
Installed
Installed(local orobsolete)
Notinstalled
Residual config
Click on the “Residual config” text. (If the “Residual config dialogue does not
appear, that means you do not have any Residual Config packages on your machine
and you can skip this step.) Do you see the packages that popped up in the
window on the right? Those are the Residual Config packages. To get rid of these
pests, click on the box to the left of the package name and select “Mark for
Complete Removal”. After you have done that for all of the Residual Config
packages, look at the top of the Synaptic Package Manger window. Do you see the
green check mark with the text “Apply” right under it? Click that button, and
you’ll flush all those Residual Config packages down the toilet!
02. Getting rid of partial packages
This is yet another built-in feature, but this time it is not used in Synaptic
Package Manager. It is used in the Terminal. To access the Terminal, go to
Applications > Accessories > Terminal. Now, in the Terminal, key in the
following command (or you can just copy and paste from here):
Shell
1
sudo apt-getautoclean
Enter your password when prompted and press Enter. See the package names that
appeared in the Terminal? Those were partial packages that have just been
deleted. Say goodbye! That’s it! This command deletes the
not-so-fully-downloaded packages that you acquire when a package that is being
downloaded is suddenly cancelled. This is my favorite little trick when it comes
to getting rid of junk files.
03. Getting rid of unnecessary locale data
For this tip, you need to download the “localepurge” package found in Synaptic
Package Manager. “localepurge” is just a simple script to recover diskspace
wasted for unneeded locale files and localized man pages. It will automagically
be invoked upon completion of any apt installation run.
To open Synaptic Package Manager, follow the instructions in step 1. After
opening up Synaptic Package Manager, click the Sections button on the bottom
left hand corner of the window, if it is not already clicked. Next, at the top
of the Synaptic Package Manager window, click the Search button. In the search
window, key in the following text :
Shell
1
localepurge
Did the “localepurge” package popup in the package window? It probably did,
unless you do not have the correct Repositories. Now, click on the box next to
the “localepurge” package name. Click on Mark for Installation. Now click the
Apply button at the top of the window and wait for the downloading and
installing of the “localepurge” package to finish. Once it is done, a new window
should popup that has a bunch of abbreviations on it. for example:
Shell
1
2
3
4
5
6
en
fr
po
sp
ka
etc...
You want to select the abbreviation of the language that you speak, or use with
Ubuntu, ignoring the capitalized ones. For example, I speak english, so I would
select the “en” abbreviation. A french speaker would select the “fr”
abbreviation. So on and so forth… Then click next. All done!
04. Getting rid of “orphaned” packages
For this tip, you need to download the “deborphan” package found in Synaptic Package Manager.
“deborphan” finds “orphaned” packages on your system. It determines which packages have no
other packages depending on their installation, and shows you a list of these
packages. It is most useful when finding libraries, but it can be used on
packages in all sections…
To open Synaptic Package Manager, follow the instructions in step 1. After
opening up Synaptic Package Manager, click the Sections button on the bottom
left hand corner of the window, if it is not already clicked. Next, at the top
of the Synaptic Package Manager window, click the Search button. In the search
window, key in the following text :
Quote:
Shell
1
deborphan
Did the “deborphan” package popup in the package window? It probably did, unless
you do not have the correct Repositories. Now, click on the box next to the
“deborphan” package name. Click on Mark for Installation. Now click the Apply
button at the top of the window and wait for the downloading and installing of
the “deborphan” package to finish. Once that is done, open up the Terminal.
Instructions for doing that are located in Tip #2. After you have gotten the
Terminal open, key in the following command (or copy and paste from here):
Code:
Shell
1
sudo deborphan|xargssudo apt-get-yremove--purge
Enter your password when prompted and press Enter. See the package names that
appeared in the Terminal? Those were orphaned packages that have just been
deleted. Say goodbye! This is my second favorite way of dealing with junk files.
05. Adding a “Find orphaned packages” to Synaptic Package Manager
This is not really much of a tip on how to get rid of junk files. It’s more like
adding a “deborphan” shortcut to Synaptic Package Manager so that you don’t have
to use the Terminal to find “orphaned” packages.
Please note: You must have the “deborphan” package installed or else this will
not work.
To start this out, open up Synaptic Package Manager with the instructions from
step 1. Now, at the top of the Synaptic Package Manager window, click the
Settings button, followed by the Filters button. In the Filters window, on the
bottom left hand corner, push the New button. You can name the new Filter if you
like, but it is not necessary. I named mine “Orphaned”. With your new Filter
selected, in the “Status” tab on the right, click the Deselect All button. Next,
check the “Orphaned” option under the “Other” category. Then click the OK
button.
To use this new filter, click the Custom button on the bottom left hand corner
of the Synaptic Package Manager window. You should see the following text, or
something similiar :
Quote:
Shell
1
2
3
4
5
Broken
Marked Changes
(Whatever you named your"deborphan"Filter)
Packagewith Debconf
Search Filter
Click on the “(Whatever you named your “deborphan Filter)” text. Do you see the
packages that popped up in the window on the right? Those are the “orphaned”
packages. To get rid of these buggers, click on the box to the left of the
package name and select “Mark for Complete Removal”. After you have done that
for all of the “orphaned” packages, look at the top of the Synaptic Package
Manger window. Do you see the green check mark with the text “Apply” right under
it?
Click that button, and you’ll get rid of all the “orphaned” packages forever.